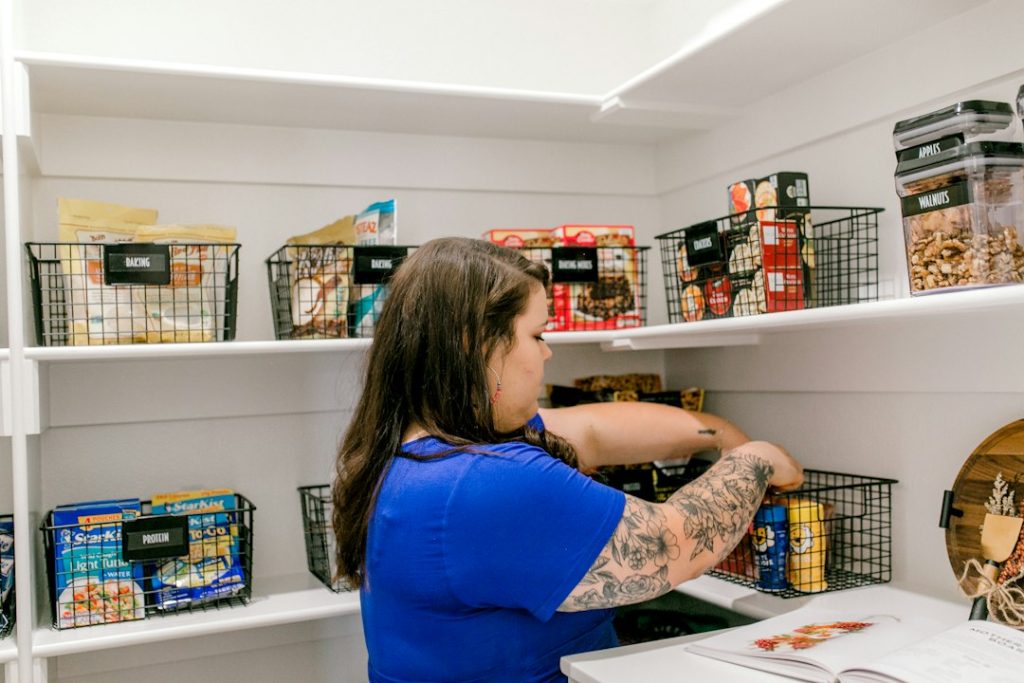
🧰 Tools & Gear You’ll Need
- Clear airtight storage bins in various sizes (stackable recommended)
- Lazy Susans (turntables) – consider different diameters for various shelves
- Adjustable shelf risers or extra shelving (optional, for maximizing vertical space)
- Label maker or sturdy labels and a permanent marker
- Deep cleaning supplies (all-purpose cleaner, microfiber cloths, vacuum)
- Step stool or small ladder (if pantry is tall)
- A willingness to declutter!
Why Your Deep Pantry Needs a Reorganization Now
That deep pantry. It’s a double-edged sword. On one hand, it offers the *promise* of abundant storage. On the other, it’s a black hole for your groceries, a graveyard for expired goods, and a constant source of frustration when you can’t find that one spice you *know* you bought. If you’re tired of playing grocery Tetris, discovering fuzzy science experiments, or buying duplicates of items already hidden in the abyss, it’s time for a deep dive into organization.
The Hidden Costs of a Chaotic Pantry
A messy pantry isn’t just unsightly; it’s costly. Food spoilage is rampant when items get pushed to the back and forgotten. You might be buying items you already have, simply because you can’t see them. The time spent rummaging through a disorganized space adds up, turning a quick snack grab into a mini-expedition. This chaos can also lead to pest problems if spills and crumbs aren’t regularly cleaned.
Maximizing Space: The Deep Pantry Challenge
Deep pantries present a unique challenge: the “back of the shelf” problem. Items stored here are easily lost, leading to wasted space and forgotten food. The temptation is to just shove things in, but this exacerbates the issue. True organization means making every inch accessible and functional, from the front row to the very back wall. This requires a strategic approach, not just more containers.
The Power Duo: Clear Airtight Bins for Pantry Perfection
Clear, airtight bins are the workhorses of pantry organization. Their transparency allows you to see contents at a glance, eliminating the need to pull out every container to find what you need. The airtight seal protects your food from moisture, air, and pests, extending shelf life and maintaining freshness. Think of them as individual, visible lockers for your pantry staples.
Choosing the Right Airtight Bins: Size, Shape, and Seal
Variety is key. You’ll need different sizes for different items. Small bins are great for spice packets, tea bags, or snack bars. Medium bins work well for pasta, rice, nuts, and baking supplies. Larger bins can house bulk items like flour, sugar, or cereal. Opt for modular, stackable designs to maximize vertical space. Rectangular or square shapes are generally more space-efficient than round ones, fitting snugly together without wasted gaps. Always check the seal – a good silicone gasket is essential.

Decanting Delights: What to Store in Airtight Containers
The golden rule: If it comes in a bag or box that can be opened and spilled, decant it. This includes cereals, pasta, rice, beans, flour, sugar, baking mixes, snacks (chips, pretzels, crackers), nuts, dried fruit, coffee beans, and pet food. Decanting not only keeps food fresher and prevents spills but also creates a uniform, tidy appearance. Avoid decanting items with very short shelf lives or things that require specific moisture levels unless the container is specifically designed for that.
Stack ‘Em High: Efficient Stacking Strategies for Bins
Stackability is crucial, especially in deep pantries where vertical space is often underutilized. Choose bins designed to nest or stack securely. Place heavier, larger bins on the bottom shelves and lighter, smaller ones on top. Don’t stack so high that the upper bins become unstable or difficult to reach. Consider clear risers or small shelf units within the pantry to create multiple stable stacking levels for smaller bins.
Revolutionizing Reach: Lazy Susans for Effortless Access
For deep shelves, a Lazy Susan (or turntable) is a game-changer. It brings items from the back to the front with a simple spin, eliminating the need to dig through everything. They are perfect for oils, vinegars, sauces, spices, jars, cans, and even smaller bags.
Selecting the Best Lazy Susans for Deep Pantries
Look for Lazy Susans with a non-slip surface to prevent items from sliding off during rotation. Ball bearings ensure a smooth, effortless spin. Consider the depth of your shelves when choosing a diameter – you want the turntable to fit comfortably without hitting the shelf above or the pantry door when closed. Clear acrylic or sturdy plastic are common and practical materials. For heavier items like large bottles of oil, opt for a model with a reinforced base and higher weight capacity.
Strategic Placement: Where to Position Lazy Susans
Place Lazy Susans on the middle and lower shelves, where access is easiest. They are ideal for corralling groups of similar items. For instance, a Lazy Susan dedicated to baking extracts and oils, another for your most-used spices and seasonings, or one for condiments. Position them so they can rotate 360 degrees without obstruction. In very deep pantries, you might even place a Lazy Susan *behind* other items to give you access to the items stored there.

Beyond the Basics: Creative Uses for Lazy Susans
Don’t limit Lazy Susans to just bottles and jars. Use them for:
- Baking Supplies: Keep piping bags, tips, sprinkles, and small extract bottles organized.
- Snack Stations: Group individual snack packs, granola bars, or fruit cups.
- Coffee & Tea Corner: Store K-cups, tea bags, sugar packets, and stirrers.
- Kid-Friendly Zone: Place easily accessible snacks and lunchbox items for children.
- Canning Supplies: Organize lids, rings, and smaller jars.
The Deep Pantry Organization Blueprint: Step-by-Step
This isn’t just about buying containers; it’s about a system. Follow these steps for a pantry that works *for* you.
Step 1: The Great Pantry Purge – Decluttering Essentials
Empty *everything* out. Yes, everything. This is non-negotiable. Group like items together on your counter or floor. Check expiration dates ruthlessly. Discard anything past its prime, anything you won’t realistically use, and any duplicates you don’t need. Wipe down shelves as you go.
Step 2: Zone Your Pantry – Creating Logical Food Neighborhoods
Now that you see what you have, group items into logical categories or “zones.” Think: baking supplies, breakfast items, dinner staples (pasta, rice, grains), snacks, canned goods, oils & vinegars, spices, beverages, etc. Assign these zones to specific shelves or areas within your pantry. This prevents items from migrating randomly.

Step 3: Implementing the Bin & Lazy Susan System
This is where your tools come into play. Start decanting items into your clear airtight bins, placing them within their designated zones. Use Lazy Susans for groups of items that are frequently used or hard to reach (like oils, spices, or sauces). Position bins and Lazy Susans strategically, keeping frequently used items at eye level and towards the front.
Step 4: Labeling Like a Pro – Never Forget What’s Inside
Label everything! Use a label maker or write clearly on sturdy labels. Label the bins themselves (e.g., “Pasta,” “Rice,” “Flour”) and also include the item name if decanted (e.g., “Spaghetti,” “Brown Rice,” “All-Purpose Flour”). For Lazy Susans, you can label the turntable itself or the items on it. This is crucial for anyone else using the pantry and for quick identification.
Step 5: Maintaining Your Organized Oasis
Organization isn’t a one-time event. Schedule quick 5-10 minute tidy-ups weekly. When you bring groceries home, put them away immediately in their correct zones. Do a mini-purge every 3-6 months to catch expired items and re-evaluate your system. A little ongoing effort prevents the chaos from returning.
Common Deep Pantry Pitfalls and How to Avoid Them
Even with the best intentions, deep pantries can become disorganized again. Here are common traps and how to sidestep them.
Over-Buying and Duplication
The sheer volume a deep pantry can hold sometimes encourages impulse buys or buying in bulk without checking current stock. This leads to multiple bags of the same flour or cans of beans languishing in the back.
Forgetting What You Have
This is the classic deep pantry problem. Items get pushed to the back and become invisible, leading to spoilage or unnecessary repurchases.
Inefficient Space Utilization
Not all shelving is created equal. Deep shelves can be problematic if not used vertically or if only shallow items are placed on them, leaving vast amounts of unused air space above.

Pro Tip:s for Advanced Pantry Organization
Ready to take your pantry game to the next level? These advanced strategies can refine your system.
Utilizing Vertical Space Within Your Pantry
Go beyond simple bin stacking. Install narrow, tiered shelving units or stackable drawer systems designed for cabinets. Use the full height of your pantry, not just the shelf depth. For extremely deep pantries, consider pull-out shelves or drawers that bring items completely out into the kitchen space for easy access.
Integrating Other Smart Storage Solutions
Think beyond bins and turntables. Wire baskets can hold produce that needs to breathe. Over-the-door organizers are fantastic for spices, small jars, or cleaning supplies. Wall-mounted racks or magnetic strips can free up shelf space. Consider a small, dedicated shelf for pet food or bulk items.
Seasonal Pantry Rotation Strategies
If you buy seasonal items in bulk (like holiday baking ingredients or summer canning supplies), create a rotation system. Store off-season items in less accessible areas (top shelves, back corners) and bring them forward when needed. This keeps your main pantry area streamlined for everyday use.